Anki: Quickstart Guide
Anki is a free program you can use to keep track of your flashcards. Anki uses spaced repetition to make sure you wait the right amount of time between reviews. Each card is scheduled separately. If a card is hard for you, you’ll see it more often. If it’s easy, you’ll wait longer between reviews.
You can tell Anki how many new cards you want to add each day, how long you want to study each day, and more. All you have to do is check each day to see which cards are due for review. Anki takes care of the rest.
Download Anki
You can download Anki here.
Anki is easy to install. Make sure you select the right download for your computer (Linux, Macintosh, or Windows).
Anki also offers mobile versions, for phones and various other devices. The instructions here are for the main, desktop version. The mobile versions have a similar interface, but also reduced functionality. Basically, you do the complicated stuff on the desktop version, and use the mobile version to review.
NOTE: I originally wrote this guide years ago, so some of the info and screenshots below have become out-of-date. I’ll be revising it soon, but in the meantime, check out the full Anki docs.
Start your first deck
Anki works with decks. A deck is a file which holds your
flashcards. First, begin your new personal deck by going to
File on the menu, and then New. You can see the
File menu in this first picture.
After you get your new file, go to the File menu again, and
choose Save. This saves your new personal deck file.
Add Cards
Entering cards in Anki is easy. Click the big green plus sign to get started.

Click Add after each card. After you add your last card, click Close.
Shared Deck
There’s also a huge selection of free decks which are contributed by
other Anki users. To get those, you do File -> Download -> Shared deck.
Main Screen

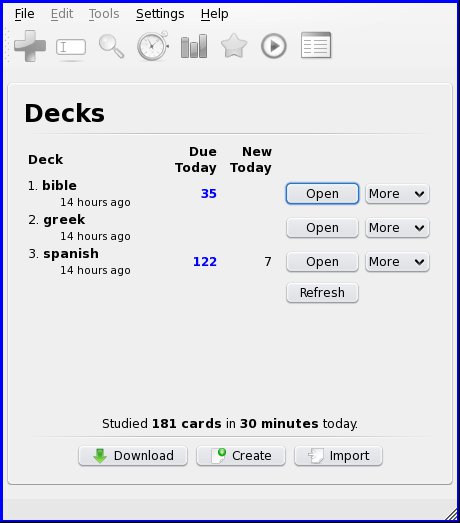
The “main screen” gives you an overview of your decks. It can be handy to divide cards into a few decks, but don’t have too many. Switching decks gets to be a pain.
This screen gives you quick information. For each deck, you can see how many cards are due for review today, and how many new cards you plan to learn.
You can only open one deck at a time. When you open a deck, you see
the Study Options screen in the next picture.
Study options

Note: The most current version of Anki may have a slightly reorganized Study Options screen. But the functionality is basically the same.
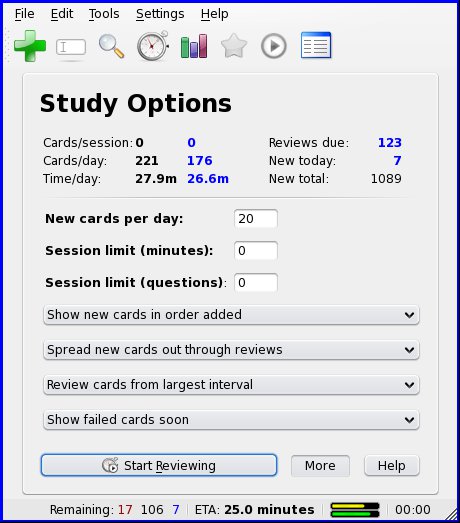
When you open a deck, you see this Study Options screen. At first,
you can skip this screen. Just press Start Reviewing, and you’ll
start studying the cards. After awhile, Anki will tell you you’re
done. Tomorrow, you’ll come back and see which cards are due.
But once you’re used to Anki, you might want to tweak these options. You can set:
- how many new cards to learn each day
- how long to study this deck before Anki closes the deck, or
- how many cards to study before Anki closes the deck
For instance, set Session Limit (minutes) to 15, for 15 minutes.
Leave the session limit for (questions) at 0. Now, when Anki says
you’re finished, you’ve studied 15 minutes.
Grading Yourself

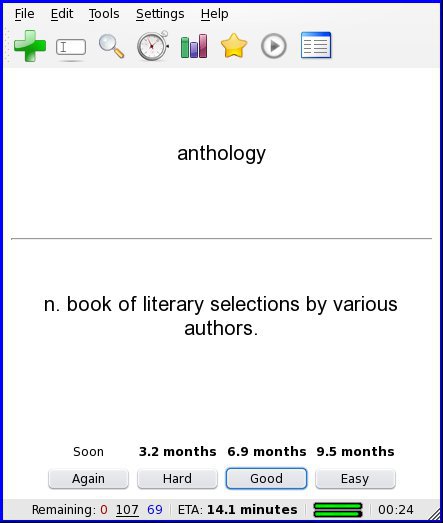
Here’s an Anki flashcard just after showing the answer. At the bottom of the card are four buttons:
- Again: You got the card wrong. You’ll see it again this session.
- Hard: You really had a hard time getting this right. Or, sometimes Anki outlines this button. That means you recently got this wrong, and should see it soon.
- Good: You hesitated a little bit, but then got the right answer.
- Easy: You got it right away!
The green + button on the top toolbar is to add a new card. The
white box button next it lets you edit the current card. That should
be enough to get you started. Don’t forget to back up your Anki deck
files!
Advanced Anki
The Anki docs are detailed and excellent. When you get curious about advanced features, they’re worth reading.